Statistical estimation is the technique of making inferences (or estimates) about a population based on sample data. Because we cannot know precisely what is happening with a population, we can only make our best informed assessments from what we know of our random sample. (Note that calculating confidence intervals ONLY makes sense if you have a random sample, do not do this if you have a non-probabilistic sample. See here for more about sampling.)
Confidence Intervals are one kind of estimation that allows us to assess where a population parameter (e.g. a mean or a proportion) probably falls between a range of values, with a particular level of confidence (usually 95% or 99%). This is how you do this in SPSS:
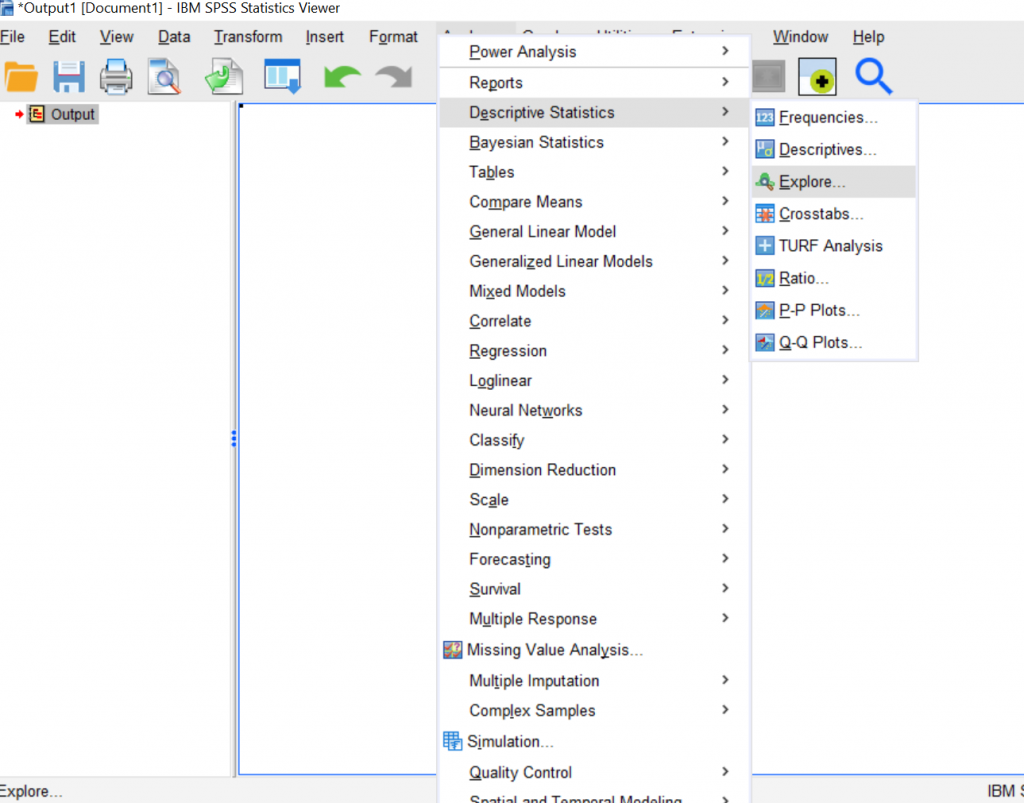
1.) Click on Analyze –> Descriptive Statistics –> Explore
2.) Move the variable you want to calculate a confidence interval for (e.g. age) into the “Dependent List:” box. If you want separate confidence intervals for two separate groups (e.g. by sex), move this variable into the “Factor List:” box as well. Then click “Statistics.”
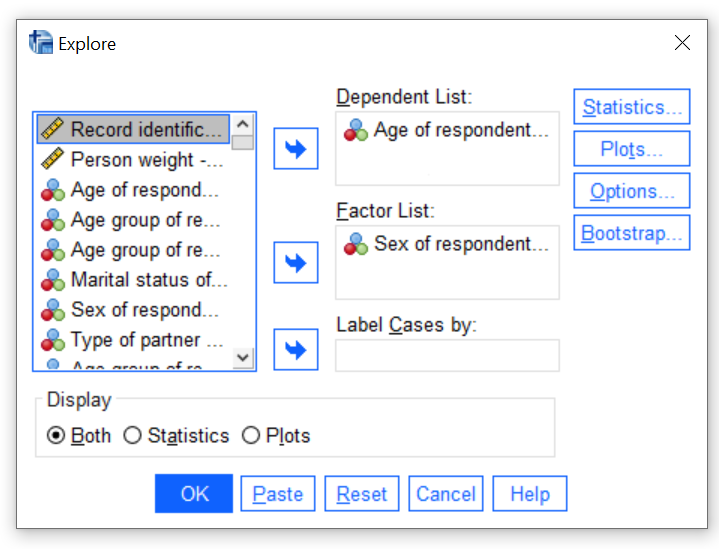
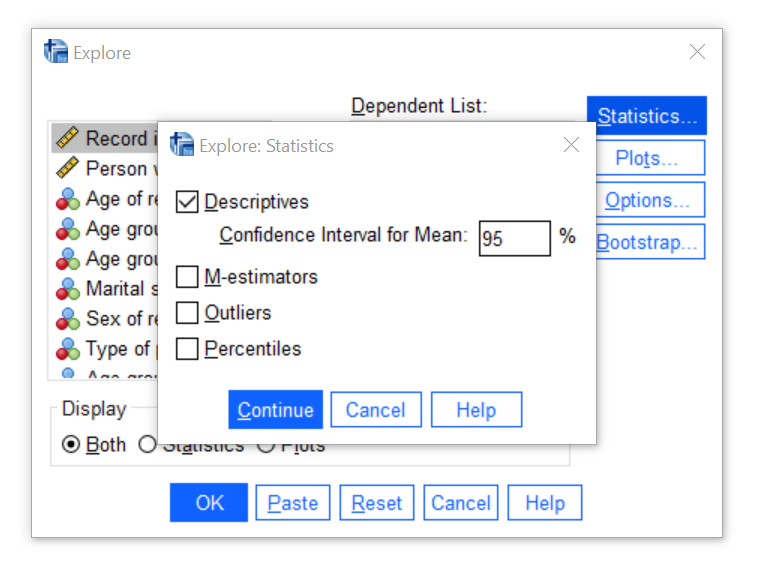
3.) Make sure Descriptives are ticked off and change the confidence level from 95% if you want an alternative value (e.g. 99%). Then click “continue.”
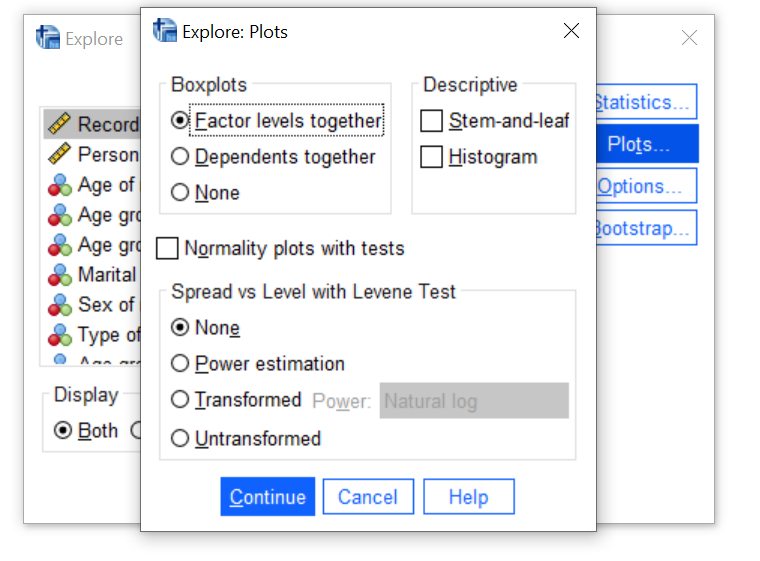
4.) If you want to more graphs to go with your confidence intervals, you can click on “Plots” to get a variety of options for stem-and-leaf graphs or histograms or to explore the shape of the distribution. The default is to offer boxplots with the factor levels together, which means the dependent variable (e.g. age) is presented separately by the independent variable, what SPSS calls the factor level. You can also get no boxplots if you are not interested in them on this screen. Click “continue” after selecting the options you need.
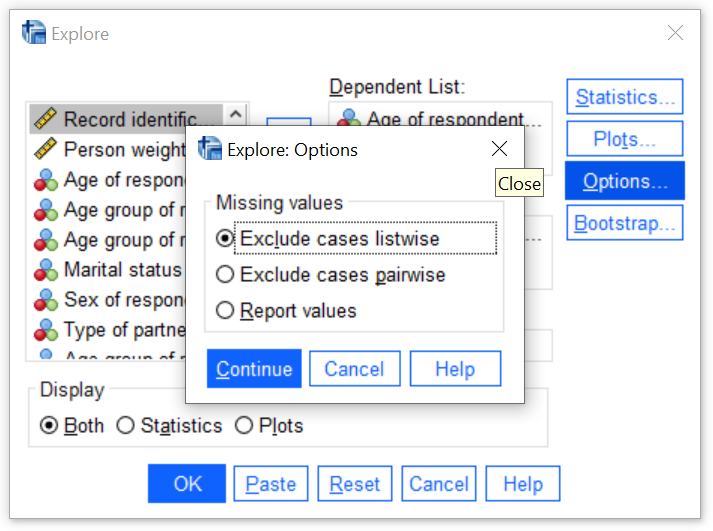
5.) Click on Options to address what to do with the missing data. The default is to exclude cases listwise, which is most often the best choice, at least as a beginner researcher. Click continue after making your selection.
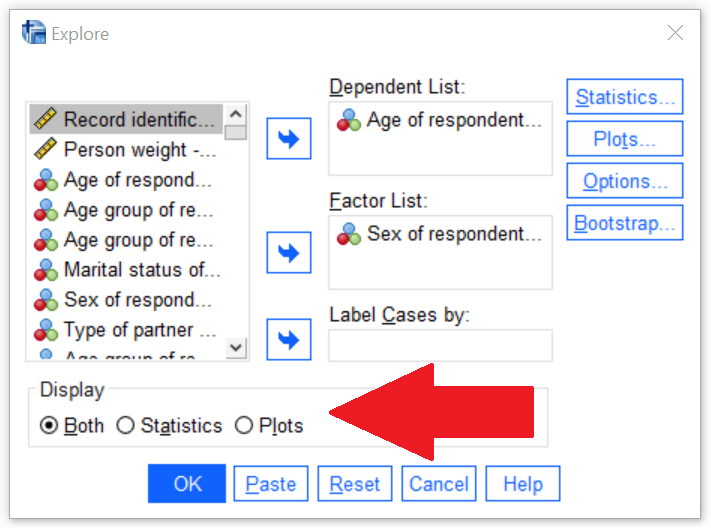
6.) If you want only the statistics or only the plots, you can select that on the main “Explore” menu. The default is to include both.
Leave at both or pick statistics or plots, then click OK.
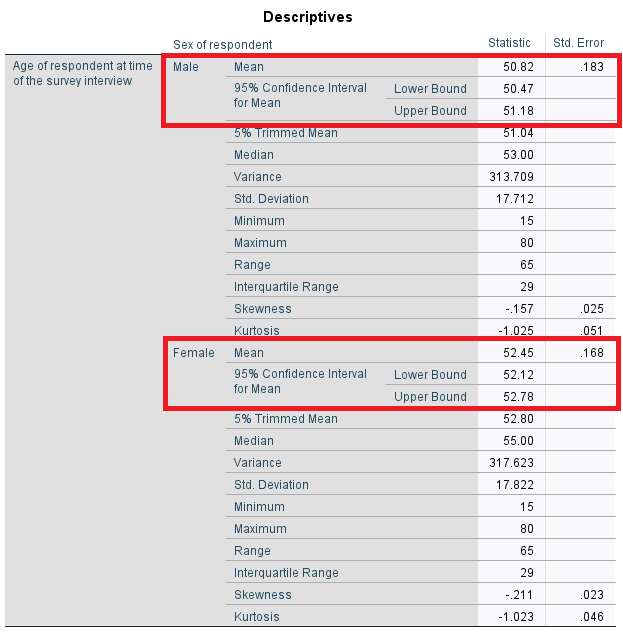
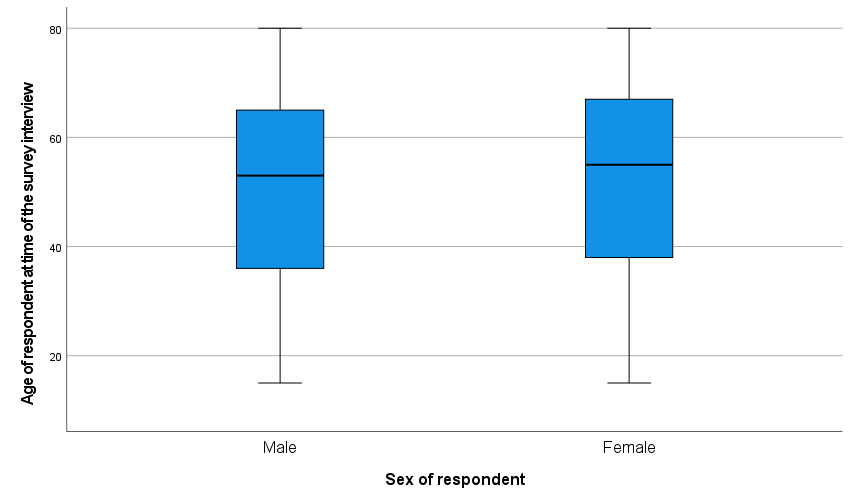
7.) Once you’ve clicked okay, your results will pop up in the output window and they will look something like the following (without the red rectangles). The “Mean” is your sample mean, below which you’ll find the lower and upper bounds of the Confidence Interval. In this example, there are two sets of statistics since we calculated the ages by gender. You can also examine the box plots to see a visual representation of the confidence intervals calculated.